One thing I like about writing this blog is that it lets me memorialize ideas and structures that I might not use right away, but that I don't want to forget. I make notes, but a picture is truly worth a thousand words. Back when I worked with seed beads, and even round stone beads, I would keep structures that I had built but didn't plan to use any time soon. I have drawers full of "interesting" structures, an I'm sure many others of you do too. But the silver tubes are too expensive, both in the cost of the silver tubing and in the time it takes to cut, debur and oxidize them, to do that. So I'll be doing a couple of posts about ideas I've worked with that may or may not turn into something.
I'm finding that the tet (tetrahedron) structure that I've been playing with for a while has some new variations for me. I've learned now to think of it as 3 separate elements, as shown in the top picture. First, at the left of the picture, there's a row of triangles. Then I turn each of the triangles into a tet, in the middle of the picture. Finally I join the top points of the tets together with a zigzag line of tubes. Playing with the different elements affects different parts of the structure.
I've had the idea for a while that if the zigzag outer row alternated between long and short tubes, then the structure would spiral up or down instead of returning to its start like a donut. In pic 2 I turned that idea into a bracelet. This is a piece that I like a lot and will certainly keep and sell. I made 2 of them. The 1st was a tight spiral made by alternating between 28mm and 25mm beads in the outer row. All the rest of the tubes are 25mm. In this 2nd one I alternated between 28 and 22mm tubes, which made the spiral longer, and also made the overall bracelet diameter larger. As I have a small wrist I have a tendency to err on the side of bracelets that are pretty small, and I need to have a wider range.

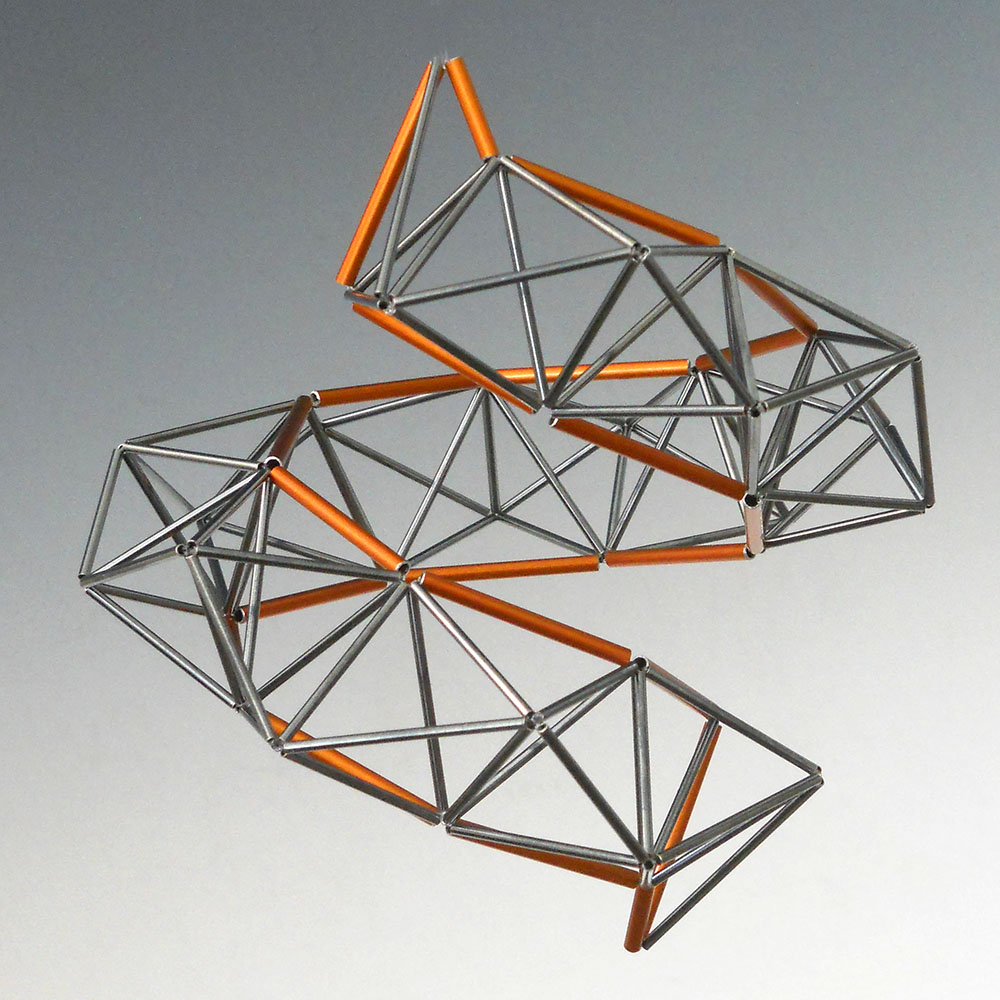
The last picture is a potential necklace that I like quite a bit, but I did so much ripping and redoing that it has way too many threads hanging out, and I don't think I could ever make a firm enough piece out of it. More importantly, the idea was to put some contrasting color tubes in it to add interest. I used light green tubes, and they just don't show up enough. In the picture you can hardly see them. There's an area at the bottom left and a smaller one midway up the right side, But they barely show. Possibly my mistake was in only changing the color on the top layer of the area, instead of using all colored tubes there.
But anyway, back to the structure. That length of the tubes in that outer zigzag row determines how tight the curve is. Longer tubes make for a tighter curve. If the outer tubes are somewhere around 2/3 the length of the other tubes (in a structure that's otherwise equilateral) the structure won't bend at all, but will continue in a straight line. Shorter that that and it curves inward. That means you can put that initial "belt" of triangles in the middle of the structure. Then you build tets on both the inside and the outside, and use short tubes to make a negative curve on the inside and long tubes for a positive curve on the outside. That was the initial idea, and it worked. The trouble and endless redoing came from making it curve and taper properly and also curve over your shoulder the way it should. I've been wanting to take it apart and reuse the tubes, and now that I have a good picture and notes, I won't forget it and I can rip it .